Friday, May 28, 2010

May Blissful Sunset DT layouts

I must admit to hoarding my scraps from the Timeless Daydreams kits... their so lush and beautiful, I have a hard time parting with any of the scraps. Speaking of, if you haven't checked out the amazing kit gallery, I'll bring it to you here. The kit is bright, yet subtle and will yield you many beautiful layouts.
(you can click on any photo to view it larger)
From Laurajean, our May guest designer


Dolores Cancel

Leah Crowe
There are only a handful of May kits left, so hurry and get yours!

Wednesday, May 26, 2010

**RoseBud Flowers** Tutorial

This is ONE of my favorite Flowers
to make and they are
super easy to make!!!!!!
Here is what you will need to get started...
**Pattern paper(double-sided, because both sides of the paper will show)
**some sort of mist (I used "spring Rain" Glimmer mist, its basically clear, but you can use any color you like)
**Adhesive(I used Helmar 450 QuickDry, which is in the store and is the BEST)
**Paint, Stickles or anything you want for sparkle, I've used both


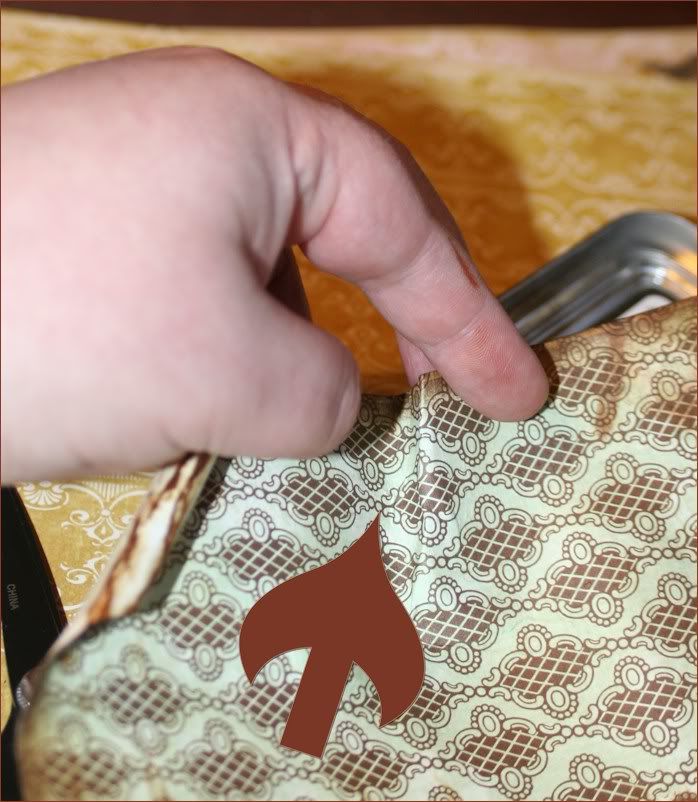
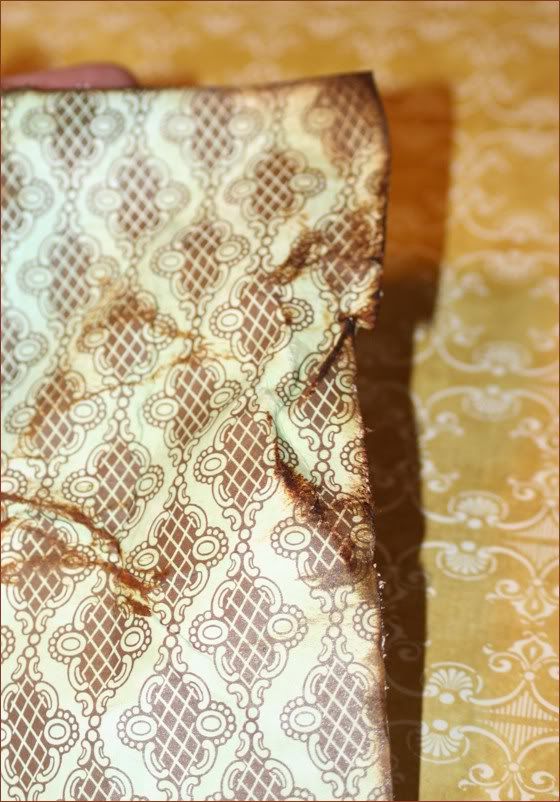
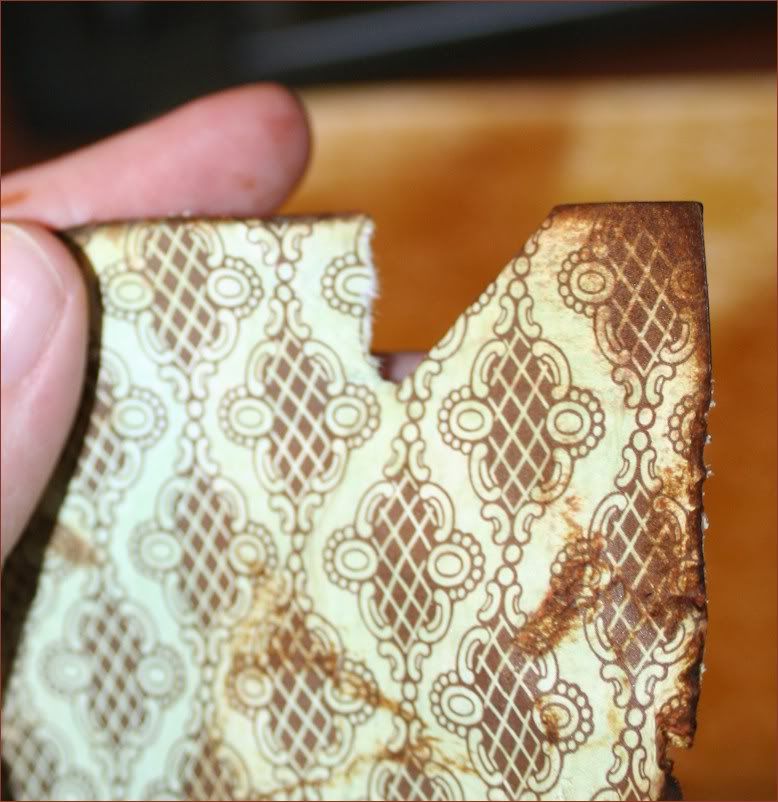
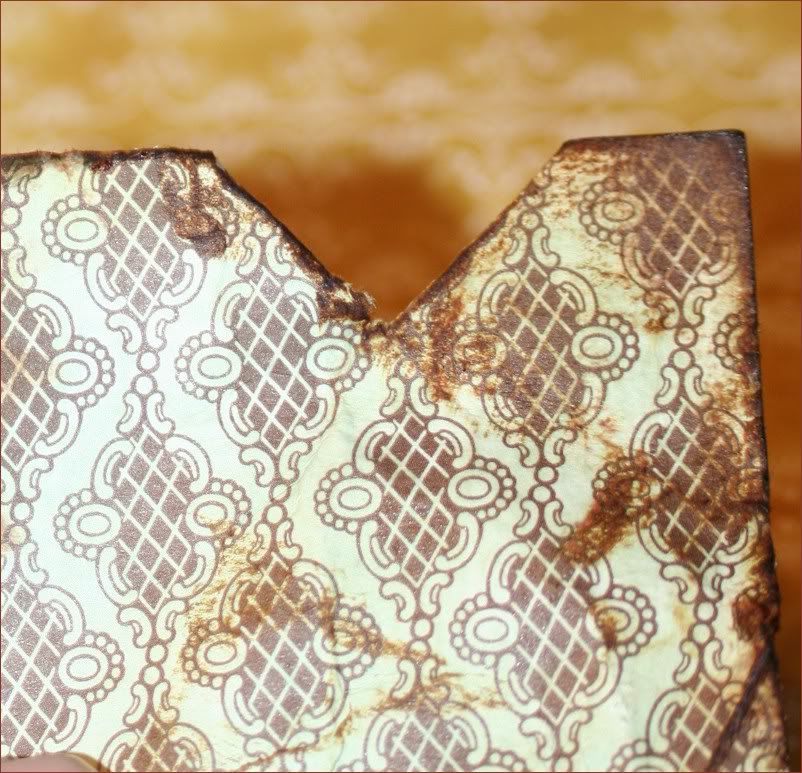
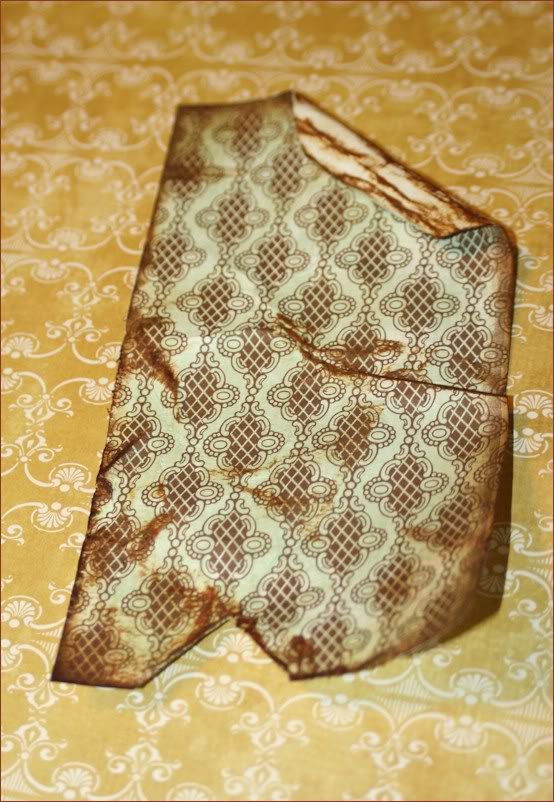
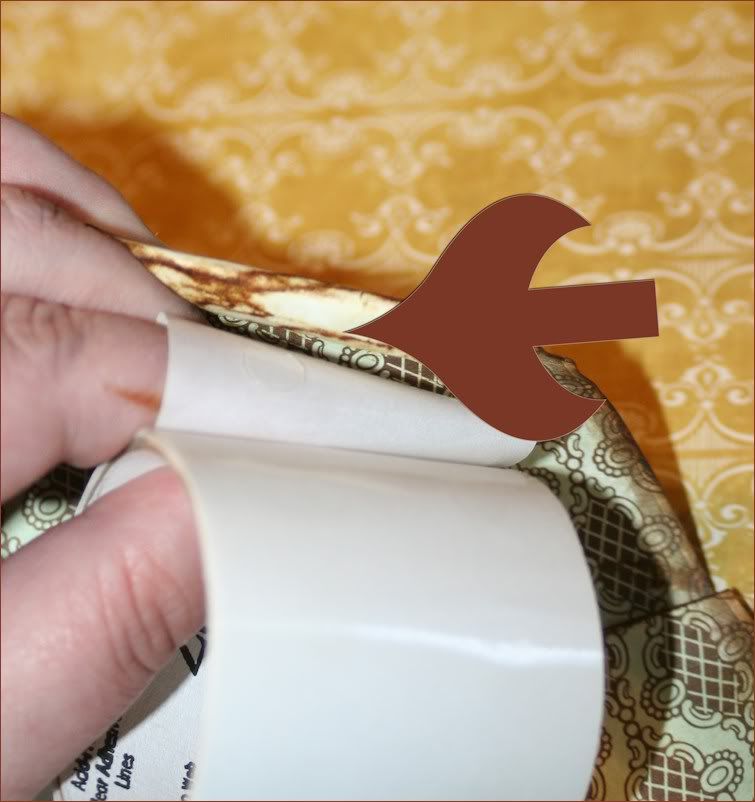
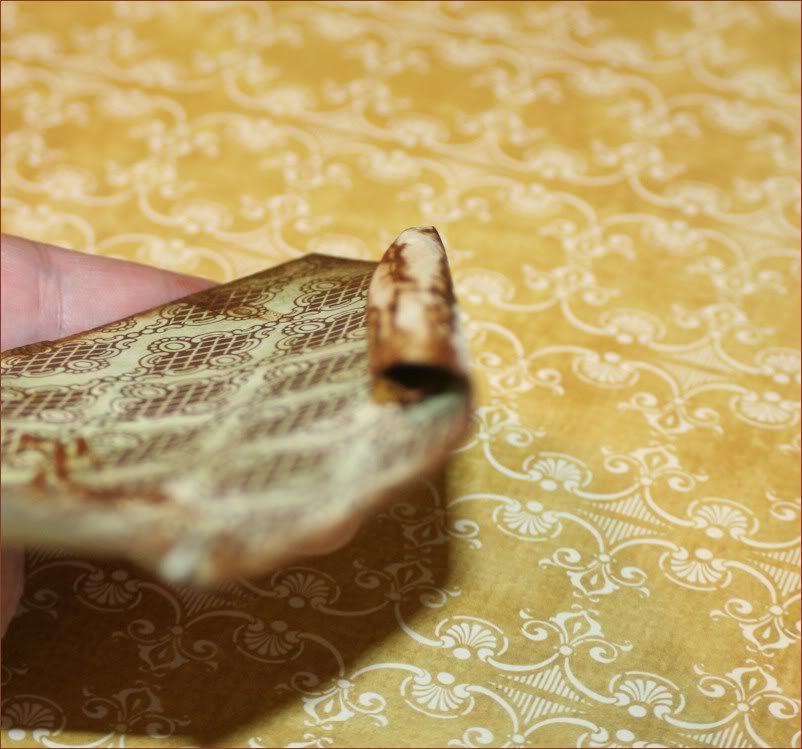
Step 1: Cut a swirl in your paper paper like this...


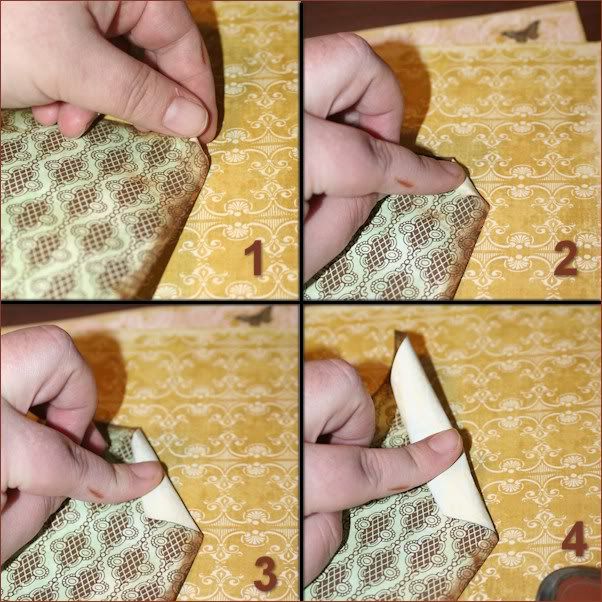
Step 2: Spray your swirl/flower lightly with Glimmer mist, on both sides and let dry abit. I mist the flower so its easier to manipulate the flower and turn the edges while folding...


Step 3: Start folding the flower like this, you can start turning the edges to distress it abit, it's up to you...I like a NOT perfect flower...


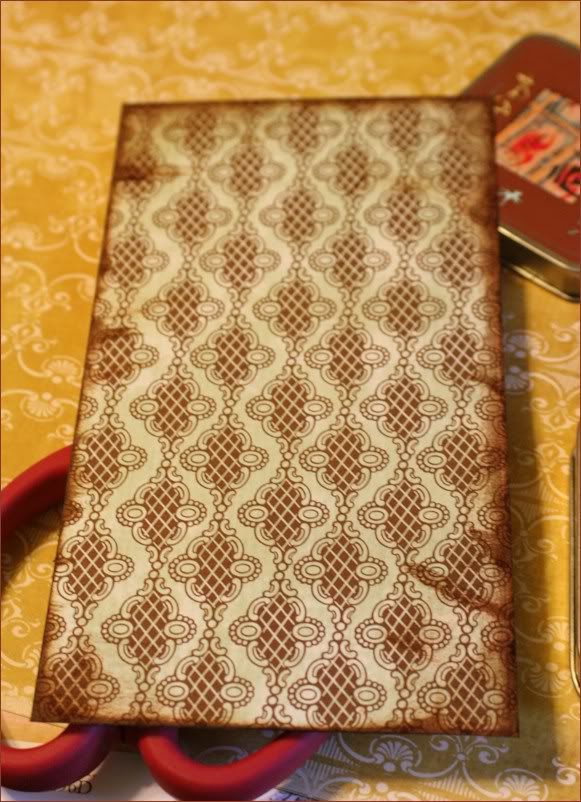
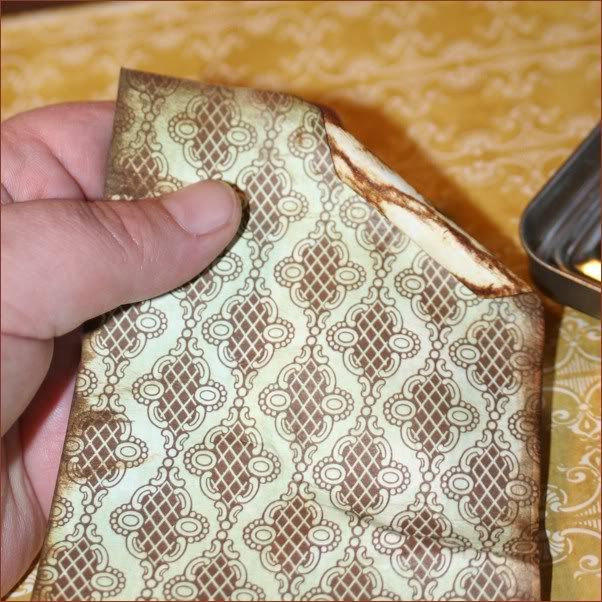
When you are finished folding the flower it will look something like this (when you are happy with the size of your flower, cut off the pattern paper access and glue to flower with your adhesive:

Step 4: Next, you will need to cut a small circle out of the pattern paper to put the flower on to stable it better, use your Adhesive for this part...


Step 5: Now, you can leave the flower the way it is or distress it up abit...I used the shimmerz paint and painted the flower edges and turned/rolled them abit...


Now, you can use the flower like this or dress it up abit more, as I did here..I torn apart a prima flower and used the center of it for my center of my rosebud flower and then glue my flower to a prima flower...like this...


Check out a couple of my layouts using these flowers...


AND a recent layout using the MayKIT...


Can't wait to see ALL of your flowers :)
Thanks for looking!!!
~Laurajean

Sunday, May 23, 2010

Sketch Inspirations

Want a chance to get a free kit! How you ask? Easy this week Timeless Daydreams is sponsoring Sketch Inspiration site. Sketch Inspiration is a scrapbooking community with weekly sketches available to inspire the creativity within yourself. See what our Designers created with the sketch provided using our May Blissful Sunset Kit! Check them out and be inspired to create and hey you never know you may win our awesome kit!

Wednesday, May 19, 2010

Meet our May Guest Designer ~ Laura Miller

We are so excited to have Laura as our featured May guest Design Team member! 
Let's learn a little bit more about Laurajean!

Hi, my name is Laura Miller aka Laurajean and I’ve been married to my husband, Bill for 19 years and we have two beautiful children together, Danielle (13) and Kaleb (9). My husband is active duty with the USMC and we are currently living in Jacksonville, NC, where we hope to retire and stay.

I’ve been scrapbooking for several years now and am totally addicted. I’d never really heard of this hobby until I was looking through my neighbor’s album one afternoon and was totally hooked. I didn’t really get “seriously addicted” until I moved to Missouri and started browsing magazines and the stores they had out there. And for me it was all about the pattern paper….love ALL of it!!!

My main reason today for scrapping is to leave a piece of my life behind for my kids and family. My mom doesn’t have many photos of my childhood and the ones she does have, she can’t remember names, dates and places. So for these reasons, I started scrapping everything…the good along with the bad.
I'm very excited to be part of Timeless Daydreams and look forward to designing with the awesome kits that both Dolores and Michele put together!! 

Here are a couple of Laurajeans layouts with the blissful May kit.
I feel like I've known LJ for years. She's always so fun, supportive, not to mention a fantastic inspirational scrapbook artist. We threw some questions LJ's way, and here's what she had to say. :)

 What is your favorite technique? My favorite technique would have to be distressing with my scissors..I just about use them on every layout!!

Where do you get your inspiration? I get inspiration everywhere, my photos, online communities, magazines/catalogs
What is your favorite embellishment? I would have to say flowers...ALL of them!!!

The time of day you are most creative? Does it vary much? I usually scrapbook during the morning/afternoon, while my children are outside playing or at school...I'm not much of a night-time scrapper.

If you could choose one manufacturer to receive a free years supply of product from, who would you choose? Prima would be that Manufacturer for me...I absolutely LOVE their flowers, bling, papers, alphas...you get the point!!

Do you prefer dinner at home, take out, or eat in a restaurant? Duh, at a restaurant...if I don't have to cook, I'm good!!
What is your favorite color and why? Its a toss-up between Yellow & Orange...this colors just make me smile, so bright and fUN!!

What is your best organizational tip? My Clip-It-Up Organizer...I LOVE having most of my stash at my fingertips...works for me!
How do you overcome Scrapper's Block? I usually find a good Challenge or Sketch to work on and that usually curbs it for me and if not...then I just do something else for awhile and come back to it later!!

What’s the last song you downloaded to your ipod – or the song you just can’t get out of your head right now? "Not Myself Tonight" by Christina Aguilera

The words that would be describe my style are: All over the Place...lol

Name a food in your house you never run out of. Cereal, my kids could eat it for all three meals :)

Name something that makes you smile when you see it? My children, they are always doing something that makes me laugh!

What is the craziest thing you have ever added to a scrapbook page? I would have to say a pair of pantyhose for a Guttergirlz Challenge.

Name one thing on your wish list. Distrezz-it-all 

Thanks so much Laurajean! You can keep up with LJ on her blog at:  http://laurajeanmiller.blogspot.com/

Stay tuned and keep checking the May kit gallery to see all the gorgeous ways to use your kit!

Monday, May 17, 2010

New staff position opening!!

New Position open here at Timeless Daydreams!
We are looking for a creative outgoing person who loves our site!!

POSITION: Contest Coordinator - Staff Position at Timeless Daydreams


Duties include:
Create monthly scrapbooking contest. ex. layout contest, card contest, etc...The more creative the better!!!
Post Contest on our forum, Scrapscene and Scrapbook Calls, Willowtraders and any other site that allows it.
Send admin contest details for posting on Facebook Fan page and Bulk Forum email.
See contest through from beginning to end, From promoting to reminders for contest cycle.
Communicate with winner for address info - send address to admin.
Timeless Daydreams provides the prize.
Coordinator must be socially active on our boards and other boards.
Compensation - Nice Discount in the store.

If you are interested - please send an email to Michele telling her why you would be the perfect Contest Coordinator!

Thanks and good luck!

May kit available now!

Check out our gorgeous May kit
In store now and shipping!
Included in the kit:
7 Gypsies
5 Sheets of 12x12 Double Sided Patterned Paper
1 Sheet of TOP TEN 97% Complete Stickers

Kaisercraft
5 Sheets of 12x12 Double Sided Patterned Paper

Prima
1 Pack of Belle Artes Aquarius flowers
1 Pack of Lilliput Roses Tropocale

Jillibean Soup
1 Pack of Corrugated Green Alphas - 87 Pieces

Jenni Bowlin
1 Pack of Vintage Buttons - 12 pieces
Isn't it a beauty?
While you're shopping in the store, don't forget to check out all the new product.
Smooch, Jenni Bowlin, Prima Pearls & Flowers
and after you check out, come to the Forum and say HI!

Friday, May 7, 2010

Paper distressing techniques part 2 of 2

If you missed part 1 you can find it here. :)

Technique 2: creasing your paper


Continuing from the previous post, we had spritzed our paper with water. Doing this allows your paper to become more malleable, easier to shape and work with. If you want to follow along, go ahead and mist your paper with water. Using your thumb and index finger, lay them down on the paper. Push the paper with your thumb towards your index finger, and at the same time, pull with your index finger towards your thumb.
Doing so creates this lovely crease line in your paper. Play with it a bit by pulling, pushing, folding, until it is shaped to your liking. If you guessed, then this is where the ink comes in. ;) Adding ink is just visually pleasing to me, and it really helps the distressing of your paper to stand out.
Another way to create this on the edge of your paper is to use your scissors while the paper is damp, and run them across the edge of the paper.
This does two things. One, it creates this really fabulous rough edge. Two, it pushes and bends the paper in on itself a bit. Again, experiment to your hearts desire.

 Technique 3: tearing/folding your paper

There are lots of different ways to change the way your paper looks... this is one other technique I use when distressing my paper... and it takes about three seconds. You can do this with your paper wet or dry. I prefer that my paper is damp when I do this because when I stop tearing, the fibers in the paper are wet and actually have a smooth edge where I tore it at.
You can leave it as is, you can ink it, or you can fold it back.
Start with one side of the tear and fold it back behind the paper to hide it.

Do the same thing for the other side.
Ink it.. and voila.

Here's this poor little distressed piece of scrap paper in all its glory. ;)


Have fun with it. In the end, its all about what YOU LIKE, and what YOU WANT on your finished projects!
Until next time...
xoxo
Leah

Thursday, May 6, 2010

Paper distressing techniques part 1 of 2

Recently I was asked how I curled, roughed up, rolled, and distressed my scrapbook paper. The easiest way to tell you is by showing you. I will have this available by video soon, and will post it if you would like to see these techniques in action, for now, I snapped some photos. :)

What you will need:

  1. Paper
  2. Ink
  3. Mini Mister filled with water
  4. Scissors
  5. Glue dots 
  6. Heat gun (optional)
 Technique 1: rolling/curling your paper

Get your ink, and ink all around the edges of your paper. As much or as little as you like. Y'all know me, and I like LOVE my ink!
Grab your paper and your mini mister (you can get these in a pack of 3 at Michaels for really cheap) and over your trashcan or sink, mist all around the edge of the paper. (If you used a Ranger distressed Ink, you can rub the edges of the paper to create a lovely smudged look with the water and ink... in these photos, I did not use that ink) You'll notice the paper starts to curl up.. that's what we want! We are going to tell this paper how we want it to behave.

Now, at any corner of the paper, press down with your thumb and index finger, and start to roll it in. If you've ever played with playdough or making a paper cone, it is similar to that.
Roll it in as much as you like.. you can roll it tightly, or very loosely, completely up to you, there are really no rules to this. :) You'll notice your paper is still wet, go ahead and let go of it, see how it is keeping its shape? Now, if you want, grab your ink pad again and ink the top of the paper you rolled in.
Once it is dry, you can leave it as is, or you can adhere it down so it won't move around. Get your glue dots, and place one underneath the edge of the rolled paper. See where the arrow is pointing to? There.
Then press down so it sticks.
You can leave it smooshed down or you can play with it and open it back into a roundish shape.

There you have it. Easy peasy right?

Stay tuned for part 2 tomorrow!
xoxo
Leah

Wednesday, May 5, 2010

Winners & Thank You's

Just want to start by saying thank you to everyone who participated this weekend over at Timeless Daydreams. We had some amazing inspiration, from the DT Coordinator Leah who along with our Guest Designers Amanda, Laurajean, and Vieve who created awesome challenges. To the members the projects created from cards to layouts were eye candy for all to see.

Our grand Prize winner was Sisterbug {Ann Marie} Congrats look at her prize can't wait to see what she creates.


We had a few random game winners as well Jeri, Lynne, Maria, Heather and Minda! Thank you all for playing we had a blast.

Now for our blog winner so far we have
Kmassman Congrats now send us your addy!

Please continue to follow us we are trying to get 100 followers we will do 2 more drawings once we have reached 100 followers. Remember to post who sent you!!!